The CSP Wizard
The CSP Wizard was created to take the pain out of building a robust Content Security Policy for your site. By using your reports to build the policy for you, the Wizard can get you up and running in no time!
If you'd prefer, you can watch our short webinar: Getting Started With CSP and the CSP Wizard!
Getting Started
Using the Wizard is easy, you can get started with just a few easy steps and don't worry, whilst using the Wizard there's no risk of breaking anything on your site.
Content-Security-Policy-Report-Only: default-src 'none'; form-action 'none'; frame-ancestors 'none'; report-uri {URL}
To deploy this header on your website, you will need to add your URL to the example. You can find your unique URL on the Setup page in your account, make sure to set the 'Disposition' to 'Wizard', and then deploy the header on your website. Here are some examples on how to do that depending on your platform or language of choice. Please note that your report-uri value is unique to you, and you should not use those found in the examples here:
PHP
header("Content-Security-Policy-Report-Only: default-src 'none'; form-action 'none'; frame-ancestors 'none'; report-uri https://demo.report-uri.com/r/d/csp/wizard");
Nginx
add_header Content-Security-Policy-Report-Only "default-src 'none'; form-action 'none'; frame-ancestors 'none'; report-uri https://demo.report-uri.com/r/d/csp/wizard";
Apache
Header set Content-Security-Policy-Report-Only "default-src 'none'; form-action 'none'; frame-ancestors 'none'; report-uri https://demo.report-uri.com/r/d/csp/wizard"
IIS
Open IIS Manager and navigate to the level you want to manage, In Features View, double-click HTTP Response Headers. On the HTTP Response Headers page, in the Actions pane, click Add. In the Add Custom HTTP Response Header dialog box use the following name and value and then click OK.
Name: Content-Security-Policy-Report-Only
Value: default-src 'none'; form-action 'none'; frame-ancestors 'none'; report-uri https://demo.report-uri.com/r/d/csp/wizard
Creating your policy
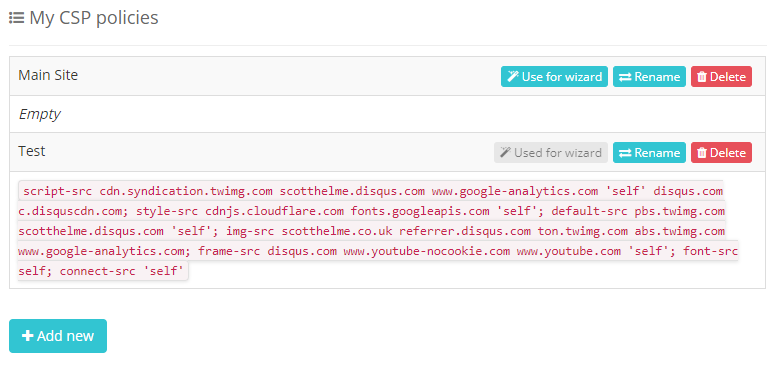
In the My Policies section of your account you can maintain many different policies and choose which one the CSP Wizard will work with. For now, use the default policy which will have been created for you and give it a name using the 'Rename' button. Once you have given your policy a name the next step is to handle updates suggested by the Wizard.
Head to the Wizard page and here you should see the changes required for your policy. For each report sent to the Wizard it will analyse the cause and suggest the necessary change to your policy. You can make an addition to your CSP if this particular resource should be allowed to load by pressing the associated 'Allow' button. If the resource should not be allowed to load then use the 'Block' button to ensure it is blocked in your policy.

In the above example if you were intending to have iframes from www.youtube.com on your site you would click the 'Allow' button. If you did not want iframes to load containing disqus.com then you would click 'Block'.
Recommendations
We would advise that you run the CSP Wizard on your site for at least 7 days to ensure that you cover all of your traffic and all of your users. You can process the list of changes at any time during the period you're running the Wizard on your site.
If you Allow or Block an item by mistake, you can click the View Blocked or View Allowed buttons at the bottom of the page to view all items you have blocked and allowed. If one of the entries was made in error you can reset it and then correctly block or allow it as required.
Once you have processed all entries in the Wizard and you aren't receiving new items the policy in My Policies will be ready to deploy to your site in Report Only mode for testing.
Using the Reporting API
The CSP Wizard is compatible with the Reporting API if you'd like to use the report-to directive in your CSP instead of report-uri as shown in the examples above. You will need to create a new reporting group and add that alongside the default reporting group. A standard Report-To HTTP header looks like this, and you can find the correct URL value on the Setup page in your account:
report-to: {"group":"default","max_age":10886400,"endpoints":[{"url":"{URL}"}],"include_subdomains":true}
To create a reporting group for the CSP Wizard, you will need to create and add a new group with updated values. When you have multiple reporting groups they are defined as a comma-separated list as follows, and the order is not important. Please note that the group used for the CSP Wizard has /wizard appended to the URL.
report-to: {"group":"wizard","max_age":10886400,"endpoints":[{"url":"{URL}/wizard"}],"include_subdomains":true},{"group":"default","max_age":10886400,"endpoints":[{"url":"{URL}"}],"include_subdomains":true}
Here you can see the new group called wizard and the updated url with the wizard path value to indicate that reports should be sent to the Wizard for processing. You can now use this new reporting group in your CSPRO header.
Content-Security-Policy-Report-Only: default-src 'none'; form-action 'none'; frame-ancestors 'none'; report-uri {URL}; report-to wizard
We recommend using the report-uri and report-to values together for maximum backwards compatibility. This will not result in any additional reports being sent as the browser will use either report-uri or report-to, not both.
Useful Links
https://scotthelme.co.uk/report-uri-csp-wizard/
https://scotthelme.co.uk/content-security-policy-an-introduction/